Automation Solutions: 5 Key Sewing Operations and Machines
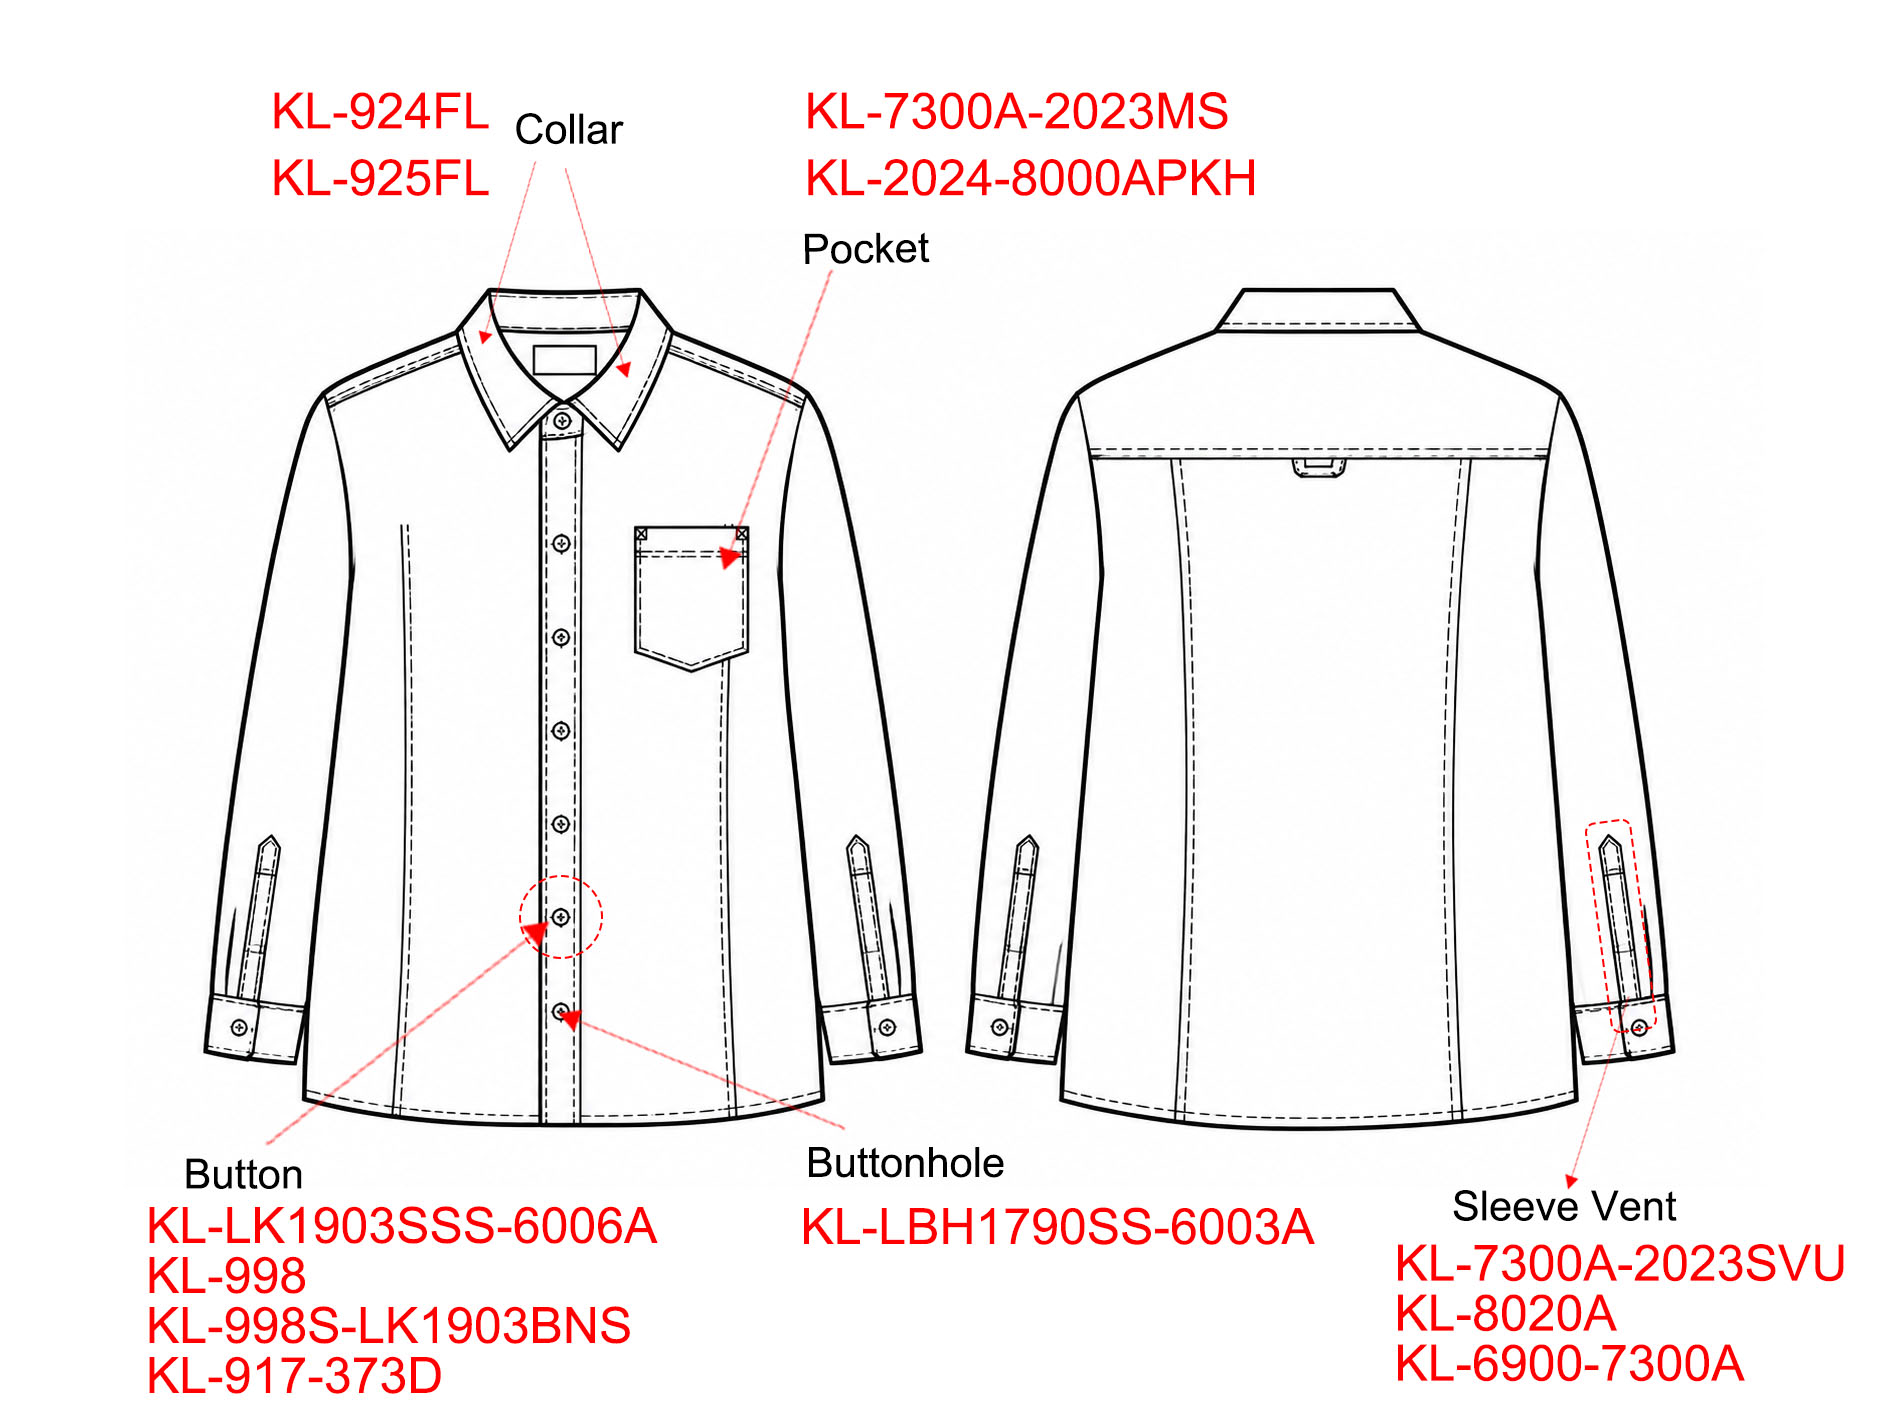
A dress shirt looks simple: a few panels, a collar, two cuffs, a placket, pockets and buttons. On the sewing floor, the difficulty is not the stitching motion itself. It is fabric control—keeping soft cloth aligned, folded and fed under the needle without drift. A practical shirt automation solution therefore does not begin with a faster sewing head. It begins at the points where fabric control is most fragile: the collar, pocket, button, buttonhole and sleeve vent.
This article walks through those five structures and shows where automation changes the process—and where a machine image or product link can be placed for buyers who want to compare configurations.
1. Collar: where symmetry is the first quality test
The collar is the first part a buyer sees and one of the hardest to keep consistent. A manual collar-tip operation depends on trimming, turning and pressing by feel. The result can vary from one operator to the next, especially when fabric finish or shift hours change.
Collar automation fixes the cut margin, turn geometry and blocking parameters as machine settings rather than operator feel. The KL-924FL collar trim/turn machine is a direct example of this logic. It consolidates trimming, turning and blocking into one automated cycle, so the collar tip that leaves the station is not the product of one operator's fingertip judgement on a given morning—it is the output of a fixture that holds the fold line and the point shape in the same position, every time.
| The machine is built around a PLC-controlled system with a touchscreen interface, which is what allows those parameters to be stored and recalled across styles and shifts. On a conventional collar line, the transition from one collar shape to another usually means re-training an operator's hand; on a PLC-based unit, the change is handled at the parameter level. This is also where the "fewer hand-offs" argument becomes concrete: trimming, turning and blocking happen without the panel being unclamped and re-positioned between steps, so the misalignment that accumulates in manual transfer is removed from the process. |

2. Pocket: small component, visible alignment
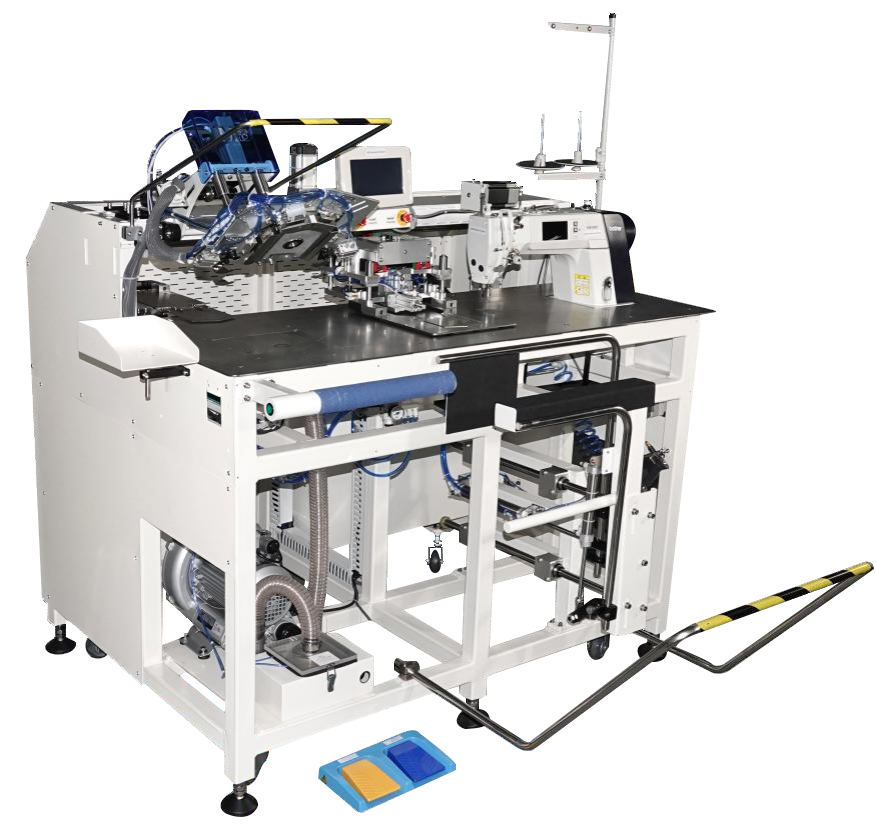
A shirt pocket is a small piece, but it sits on the front panel where any tilt or wave is immediately visible. On a manual line, the operator must fold the pocket edge, hold the shape and align it to the body panel—often on striped or checked fabric where the pattern must match.
| Automated pocket setting is less about the sewing speed and more about the fixture. On the KL-7300A-2023MS pocket setter/moon stitching, the pocket is folded through a special physical guide—no ironing station required—then automatically loaded, auto-folded, sewn consecutively and auto-collected. The sewing head is a Brother S-7300A, and the easy-pattern setting system lets the same unit run different pocket types on knit or woven light-to-medium fabrics, with an average output of 150–180 pcs/hour and minimal demand on operator skill. The template or clamp holds the pocket edge and position, so the sewing path follows a fixed geometry rather than the operator's hand; for factories running multiple pocket shapes, quick-change templates reduce changeover time while keeping the fold width stable. |
3. Button: the millimeter that decides the front
Button attaching looks like a simple end-of-line operation, but uneven spacing can make a finished shirt hang slightly off. On light-colored fabrics, the eye catches it immediately. Manual feeding can produce acceptable average results, yet the marginal shirt—the one that becomes a return—still appears.
|
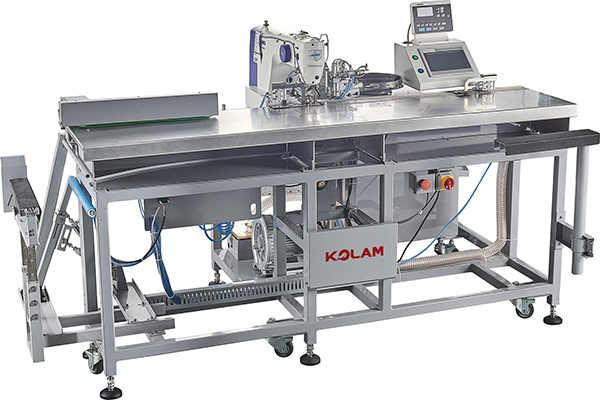
Automatic button-attaching units hold spacing and alignment within a narrow tolerance and reduce dependence on operator rhythm. The KL-LK1903SSS-6006A button setter indexer is built around that principle. It uses a JUKI LK1903SSS-6006A sewing head (Brother and Juki heads are both available as options) and runs an all-in-one cycle of auto-feeding, auto-sewing and auto-stacking, with servo-motor feeding controlling the index between buttons at high precision. A laser light marks the correct garment position, and pattern data can be transferred between machines by USB or SD card. The unit is designed so that no skilled operator is required—one operator can supervise two to three units, or run it alongside a buttonhole station. The value is not that every shirt becomes perfect; it is that the worst shirt in the batch becomes better. That matters for brand buyers who audit consistency rather than individual samples. |
4. Buttonhole: straightness under the light box
Buttonholes are a precision operation. A row that looks straight but is measurably uneven will cause the front to close slightly off. On plackets, fabric creep is the main enemy: the panel shifts between holes, and the deviation accumulates.
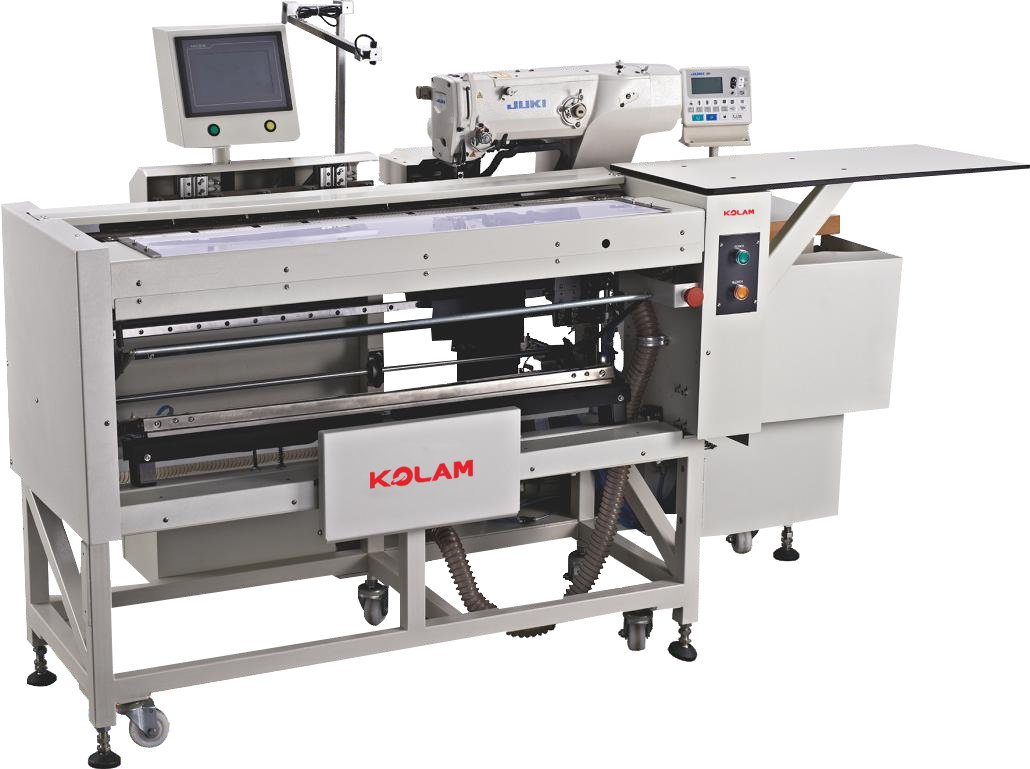
| Buttonholes are a precision operation. A row that looks straight but is measurably uneven will cause the front to close slightly off. On plackets, fabric creep is the main enemy: the panel shifts between holes, and the deviation accumulates. The KL-LBH1790SS-6003A shirt buttonhole indexer, built on the JUKI BH1790SS head, addresses this with a sub-clamping device that holds the panel in place as it transfers to the sewing area, while high-precision servo motor feeding indexes between holes and a laser light marks garment position. The unit runs auto-loading, auto-pressing, auto-buttonholing and consecutive sewing, stores up to 999 patterns, and can stitch 1–20 buttonholes per cycle. Deviation is held to a narrow band by the clamp-and-index mechanism rather than operator rhythm; one worker can supervise 2–3 machines, producing 2,000–3,000 pieces per 8 hours. In a shirt automation solution, this is one of the clearest examples of automation improving the marginal piece rather than only the best piece—the row that would have drifted becomes the row that closes correctly. |
5. Sleeve Vent: the "pagoda tip" test
The sleeve vent is a small component with a reputation. The classic pagoda tip or arrowhead shape needs a clean point, symmetrical wings and a fold that does not collapse after pressing. On a manual line, it is often used as a benchmark of operator skill.
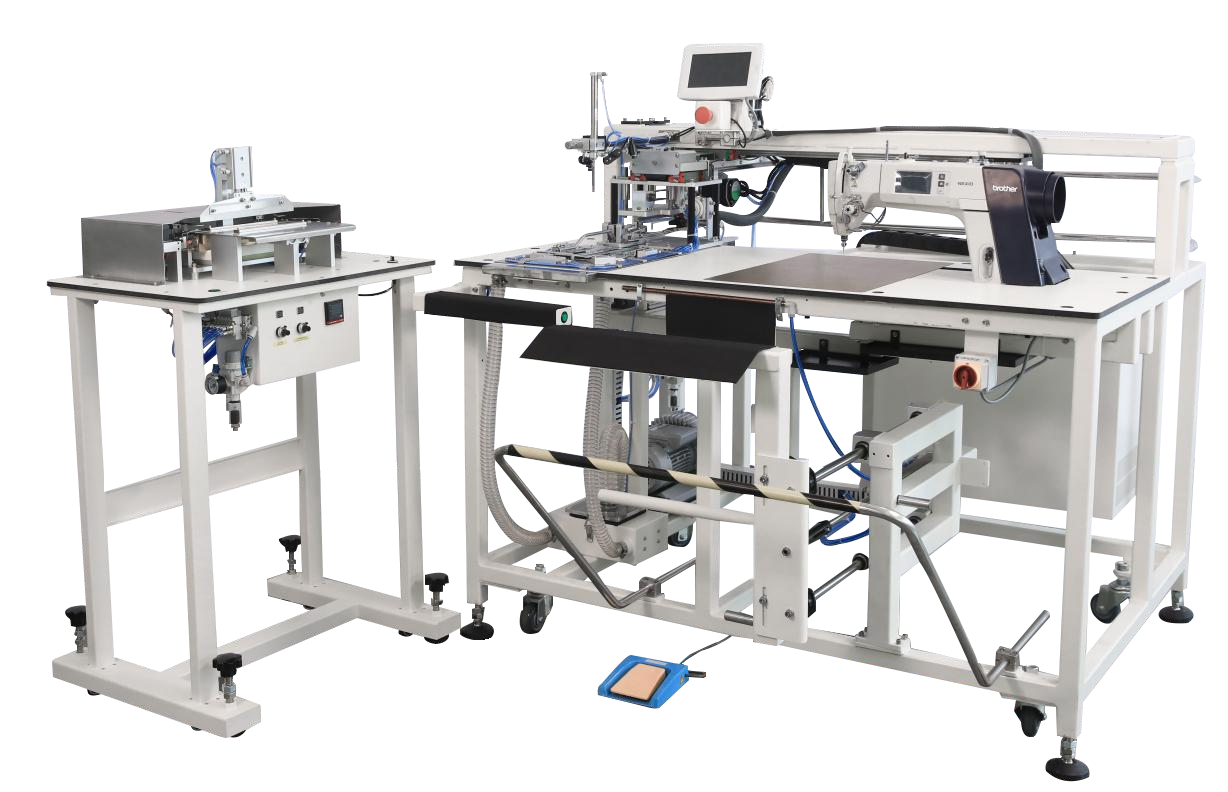
| A sleeve placket machine takes the cut component, folds the vent flaps into the correct geometry, sews the profile and discharges the finished placket. The KL-7300A-2023SVU sleeve vent unit runs on a Brother S7300A or JUKI DDL9000 sewing head and handles both left and right sleeve plackets on the same machine, with a color-match function and customizable placket dimensions. The easy jig change mechanism is what makes the fixture—not the operator's fingertips—the variable: switching between arrowhead, square or French placket styles is a clamp change, not a re-training of the station. The unit needs no skilled worker; one ordinary operator can produce 80–120 pieces per hour, more than four manual workers would complete in the same time, with minimum seam allowance held at 1 mm and less second-time rework. |
Where the five points become one system
- Individual automated stations can still lose their advantage in the gaps between them. A collar that leaves its workstation perfectly blocked and then waits in a bundle is a controlled component, but not a controlled line. That is why a shirt automation solution should be evaluated as a flow: linked collar and cuff cells, front-panel linkage, overhead hanging transport and template sewing for small curved parts.
- The practical starting sequence is usually the same: fix the structures where variation hurts most and fabric control is hardest—collar, pocket, buttonhole, button and sleeve vent—then connect those stations so the gains are not lost in transfer. The machines are specific enough to target each point. The solution is treating them as one shirt production system rather than five faster islands.
Heavy-Duty Webbing Sewing Solved: The KL-430D-0806HP Pattern Machine
Related Article